 located on the Zoom
toolbar.
 ConceptDraw offers you a number of handy tools and facilities for working with documents. You can modify and save settings for each particular document, multi-paged documents, connected with hyperlinks.
Scrolling
Zooming
Rulers and Grid
Guide Lines and Gluing
To scroll the document, you can use the vertical and the horizontal scroll
lines, or the Scroll Hand tool  located on the Zoom
toolbar.
Note: Some of the tools on the Zoom toolbar may be not displayed by default. To display all available tools on the toolbar, call the Customize dialog (menu View / Toolbars). Choose the Toolbars tab, select the Zoom toolbar in the list and click Reset. The toolbar will be set to display all its tools.
If a page is large and only a part of it is displayed, the Scroll Hand Tool lets you view it in a handy and quick way. It looks like you grab the page with the hand and move it before you.
Switch to the Scroll Hand Tool, it, grab the page with the mouse and move it in the direction you need.
To quit the hand scroll mode, just choose some other tool (for instance
the Select Tool  on the Drawing Tools toolbar).
You may also use the keyboard for scrolling:
 |
 |
|
| PgUp | PgUp | Scroll one screen up |
| PgDn | PgDn | Scroll one screen down |
| Ctrl + Home | Cmd + Home | Go to the top-left corner of the page |
| Ctrl + End | Cmd + End | Go to the bottom-left corner of the page |
For more information about the Zoom toolbar see in Toolbars - Zoom. The Customize dialog is described in Dialogs - Modal dialogs - Customize.
Zooming makes for more comfortable editing. It can help you view the whole
page, or see some shapes of the drawing in close-up. You can increase or decrease
magnification using the Zoom In  and Zoom Out
  tools on the Zoom toolbar. The following standard zoom levels
are provided (in % of actual size): 1,2,3,6,13,25,50,75,100,125,150,200,400,800,1600,2500.
Each time you use the zoom tools, zoom level changes one step higher or lower.
To enlarge the view, click Zoom In
 on the toolbar,
or select Zoom In from the View menu. You
can also use the keyboard:
 |
 |
| Ctrl + "+" | Cmd + "+" |
The shapes appear closer and you can work with greater precision.
To see a larger part of the drawing, click Zoom Out
 on
the Zoom toolbar, or select Zoom Out from
the View menu. You can also use the keyboard:
 |
 |
| Ctrl + "-" | Cmd + "-" |
 You
can select the desired zoom level or enter a custom value using the Zoom
tool on the toolbar
(also available from the View / Zoom menu). The values
may range from 1% to 2500%.
Additional commands in the list are:
Last - to return to the previous zoom level,
Page - to view the whole page,
Width - to view the entire page width.
Note: These commands are also accessible from the View / Zoom menu.
To return to the actual size of the document, just set 100% in the zoom field, or select Actual Size from the View menu.
The Zoom Box tool  is handy for quickly enlarging or diminishing the view of the selected area
on the page.
To enlarge the view: Use the mouse to select the desired rectangular area on
the page. On releasing the mouse, the enclosed part will be enlarged to fit
the entire window.
To diminish the view: Holding down the Alt (Option)
key, use the mouse to select an area on the page. On releasing the mouse button,
page view will be diminished. The larger the area enclosed by the zoom box,
the smaller zoom level will be set.
Simply clicking on the page with this tool selected works similar to the Zoom In tool (or to the Zoom Out tool if you hold down the Alt(Option) key).
To select the Zoom Box tool do one of the following:
a) Click the Zoom Box  button on the toolbar,
b) Choose Zoom Box from the View menu,
c) Use the keyboard:
 Ctrl + Shift + Z Ctrl + Shift + Z |
 Cmd + Shift + Z Cmd + Shift + Z |
To quit the Zoom Box tool, just choose some other
tool (for instance, Select Tool  on the Drawing Tools toolbar).
For more information about the Zoom toolbar see in Toolbars - Zoom.

Rulers and Grid help you position the shapes precisely in your documents, and measure the dimensions of the shapes which are on page. The Rulers and Grid use the units of measure set for the document.
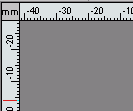
Rulers show the horizontal and vertical measurements for the
document. In the top left-hand corner of the window (where
the horizontal and the vertical rulers meet) you can see the units of measure
of the document. You can change the unit of measure for the current document
in the File / Document Properties dialog (the Settings
tab).
To show/hide rulers, toggle the Rulers
option under the View menu.
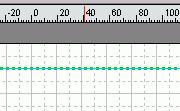
Another function of the rulers is that you can drag vertical and horizontal
Guide Lines out of them. You can glue shapes to a guide line, and
they will be moved together with the line, retaining their arrangement.
To insert a guide line, click on the ruler, drag the guide out of it, and place
it where you want it to appear. When you release the mouse button, the guide
will appear.
 Grid
is made up by thin lines crossing the document at equal intervals
The grid helps to position shape more precisely. You can show/hide the grid in the document. Use the Grid option in the View menu.
By default, the grid is not printed with the document.
If you want grid to be printed, set the Fixed
Grid mode in the Grid & Rulers dialog (Tools
/ Grid & Rulers).
Non-Fixed grid is never printed.
The Grid & Rulers dialog also lets you some other parameters of the grid for the active
document.
For more information about the Grid & Rulers dialog see Dialogs - Modal Dialogs - Grid & Rulers.
 Sometimes
you may need to align shapes horizontally or vertically, and retain this alignment
when moving all these shapes. This can be done by gluing shapes to a Guide
Line. After you glue the shapes, you can move the guide line, and
they all will be moved together with it.
A Guide Line is a special ConceptDraw shape which is used for aligning shapes and positioning them precisely.
To insert a horizontal or vertical guide line in your document, click on the corresponding ruler (horizontal or vertical), and holding down the mouse, drag a line out of the ruler. Drop the guide line in the position where you need to put it.
You can manipulate (select, move, duplicate, delete) guides in the same way as other shapes.
The Gluing mode  is active by default. It allows you to glue shapes to guide lines.
You can enable or disable this mode in the Snap & Glue
dialog from the Tools / Snap & Glue, and set Glue
to guides there. Or you can use the Glue tool  on the Snap & Glue toolbar. .
 To
glue a shape, move it to the guide line so that its side touches
the guide line, and release the shape. The shape will be glued to the guide
with the side of the alignment box. Resize handles on the glued side will turn
red.
Then you can carry the guide with the glued shape. To unglue a shape, move it away from the guide.
Note: Guide lines are not printed.
You can also glue control handles to a guide line. Turn the Glue mode on and move the control handle to the guide line. On releasing the mouse button, the control handle turns red. Now, when you move the guide line, glued control handles move with it.
It's also possible to glue control handles to connection points of shapes. It's convenient when you need to make one shape dependant on another shape's position.
More information about the Snap & Glue dialog can be
found in the Dialogs - Modal Dialogs - Snap
& Glue section.
For details about the Snap & Glue toolbar see Toolbars
- Snap & Glue.
Control handles are described in Shape Parameter Table - Adding
Control Handles to a Shape.